
Kalamkari For Beginners
Kalamkari for Beginners: Why Your First Lesson Has Nothing to Do With Painting
Learn how to get started with Kalamkari as a beginner, from using a traditional bamboo pen and drawing simple motifs to experimenting with natural dyes and creating your first textile artwork.

Rooftop
Author
Kalamkari is known for its flowing outlines, intricate patterns, and colours drawn from natural dyes. Practised in parts of Andhra Pradesh and Telangana, this traditional textile art brings together drawing, storytelling, and a careful understanding of how colours interact with fabric. Looking at a finished Kalamkari piece, it is easy to assume that creating one requires years of drawing practice or specialised knowledge of natural dyes. That assumption can make the art form seem intimidating to anyone hoping to try it for the first time.
But you don't need to be an experienced artist to begin learning Kalamkari. Its techniques can be broken down into manageable steps, from understanding the tools and drawing simple outlines to learning how natural dyes are applied and fixed onto fabric. Each stage calls for patience and practice, but beginners can start with the fundamentals without having to master everything at once. The key is to understand how the process works before attempting a more detailed design. With a little guidance and regular practice, even someone new to textile art can begin exploring Kalamkari and gradually develop the skills needed to create their own work.
Your First Kalamkari Lesson Is NOT About Drawing
Kalamkari Art First Lesson Source - Heritage India Official
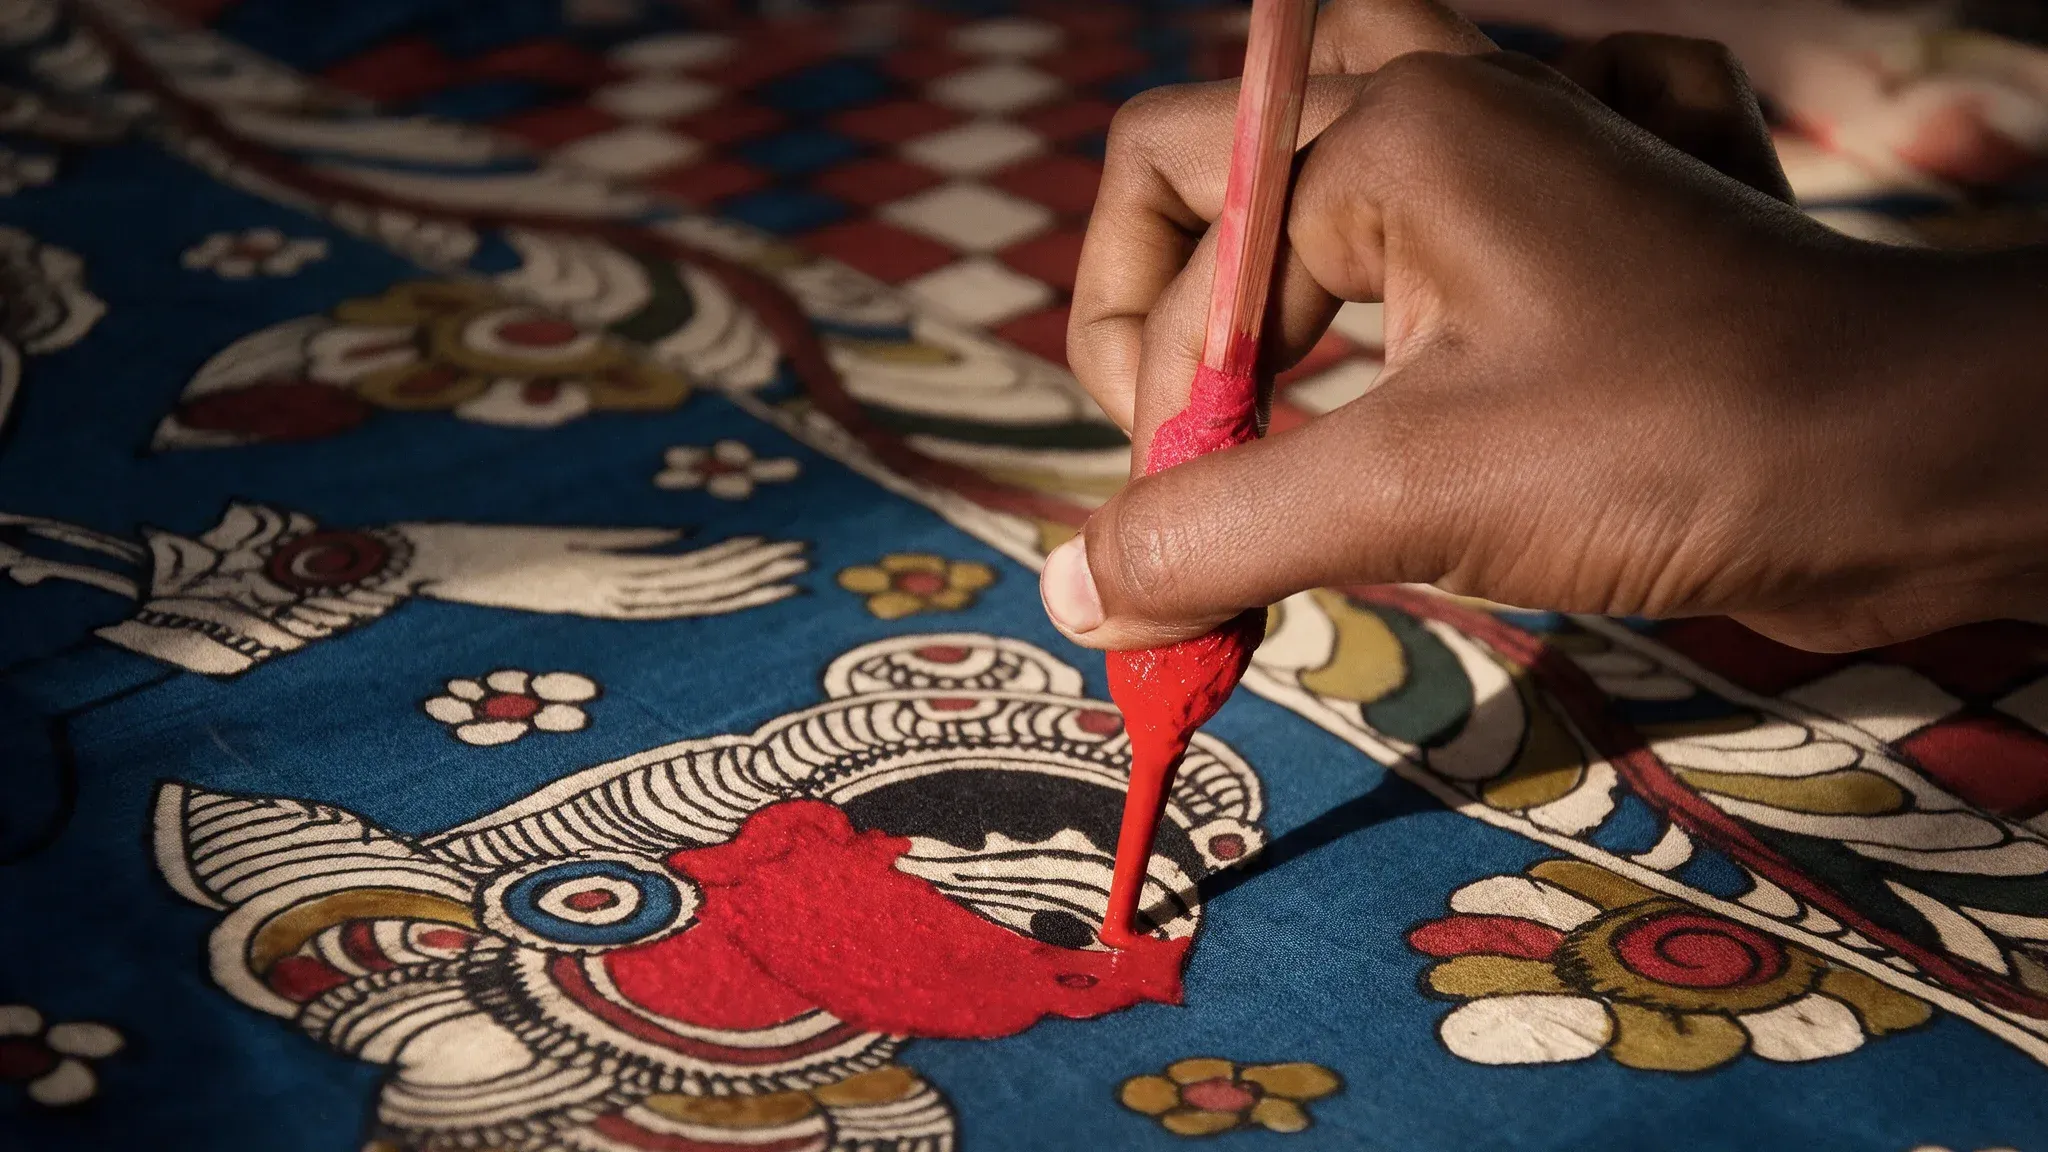
Imagine sitting down to learn Kalamkari and expecting to draw a scene from the Ramayana, only to be handed a piece of bamboo and asked to practise straight lines. That is where the learning begins. Before a beginner can draw the elaborate figures, flowing branches, or intricate borders Kalamkari is known for, they must first learn to handle the kalam, the pen-like tool at the heart of this textile art.
The traditional kalam is usually made from a sharpened piece of bamboo, with cotton or wool fibres wrapped around it to help hold and release the dye. When working with a black iron-based solution, the artist controls its flow through the tool and onto the fabric. The pressure of the fingers, the angle of the bamboo, and the movement of the hand all affect the line. What looks effortless in the hands of an experienced Kalamkari artist is actually the result of careful control built over time.
A beginner starts with simple exercises on spare cloth, learning to guide the kalam before attempting a finished design:
- Straight and parallel lines: Practise keeping the lines even, with a steady flow of dye from beginning to end.
- Curves and sweeping arcs: Learn to move the wrist smoothly without making the line wobble or changing its thickness unexpectedly.
- Dots and small marks: Get a feel for how much pressure is needed to release the dye and how the tool responds to small movements.
These exercises may seem far removed from the elaborate paintings that first attract people to Kalamkari. But they teach the control needed to draw those intricate details without losing the flow of the design. The first lesson is less about proving artistic talent and more about training the hand to work with the tool. Once that relationship begins to develop, the more recognisable elements of Kalamkari become much less intimidating.
What You Learn After Mastering the Kalam
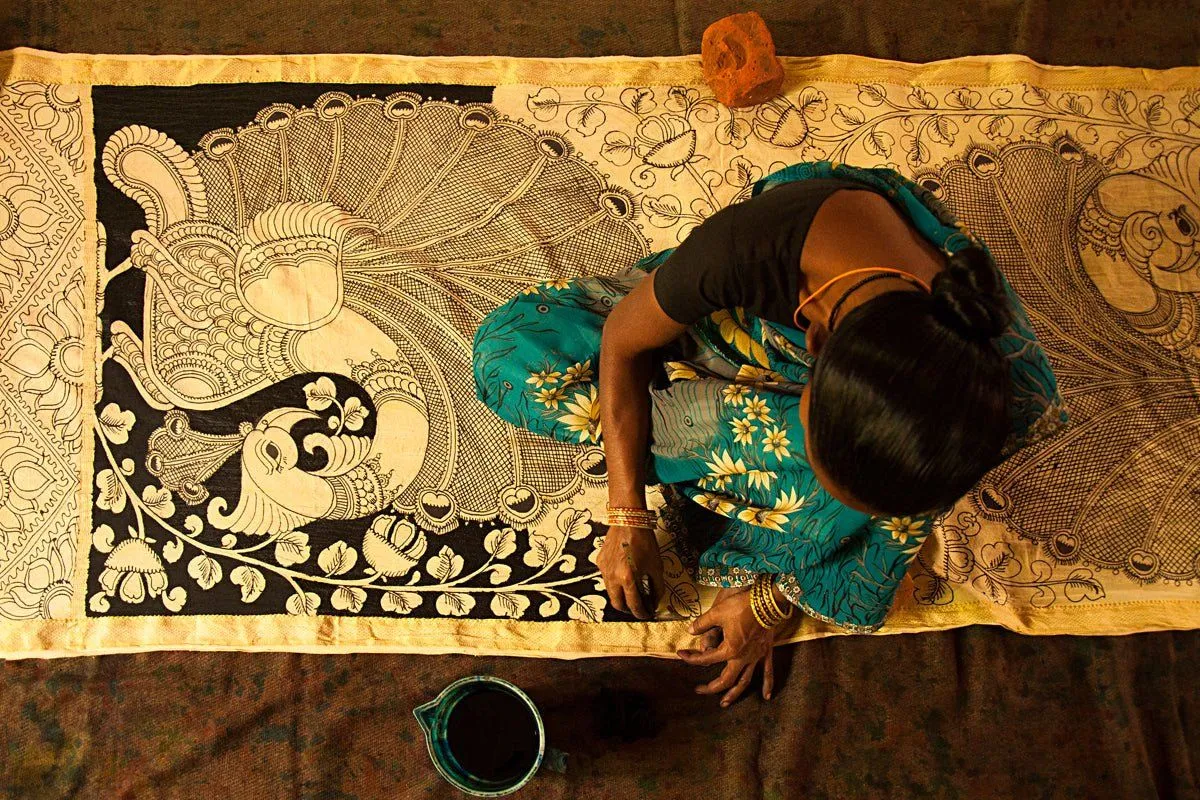
Perfecting Kalamkari Art Source - Sootishyahi
Once a beginner gets comfortable handling the kalam, the next step is to use it to create the shapes and patterns that give Kalamkari its distinctive look. Rather than jumping straight into an elaborate scene, learners begin with familiar motifs, practising each one until they can draw it with greater control. These simple forms eventually become the building blocks of more detailed compositions.
Some of the motifs beginners may encounter include:
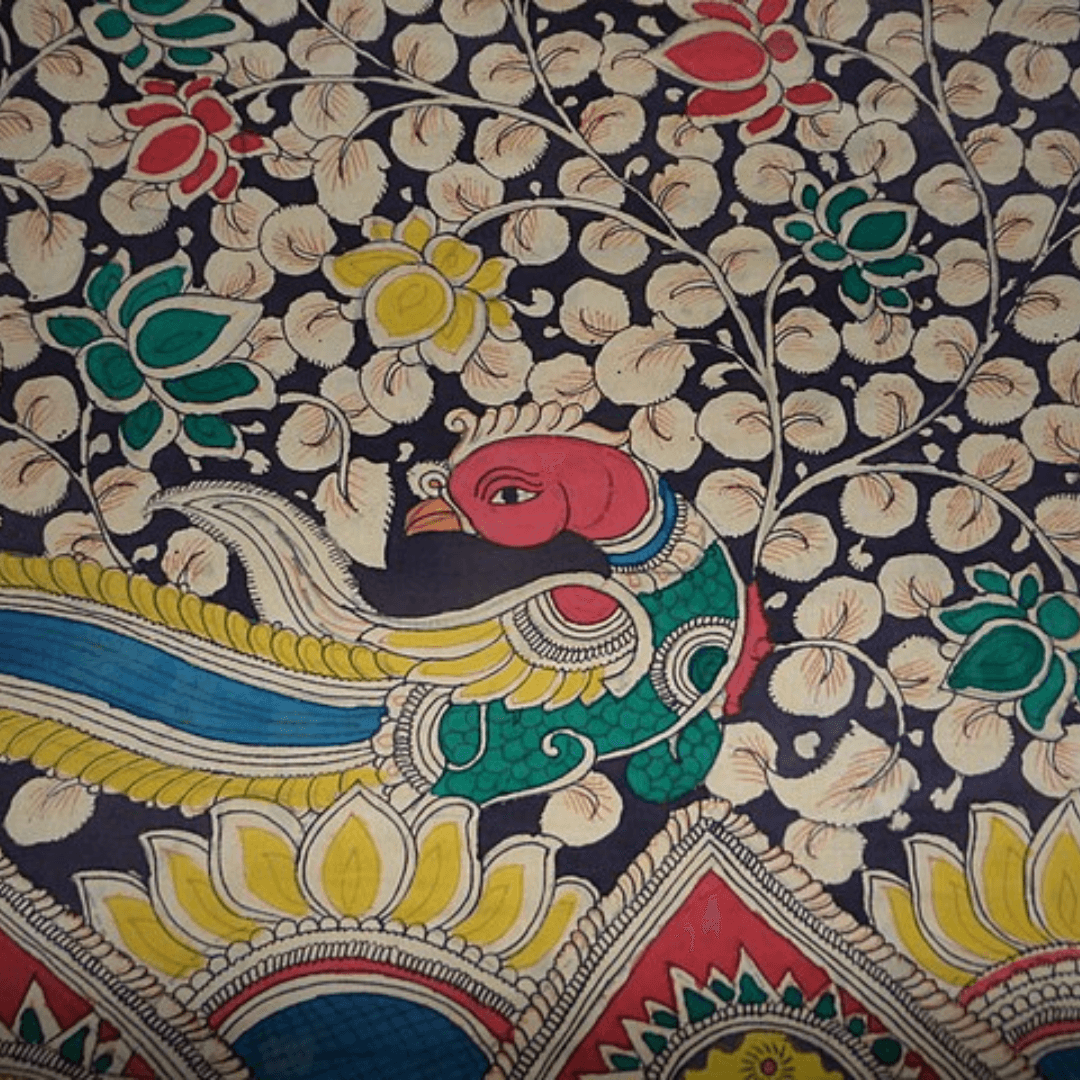
- The Mango Leaf (Kalka or Paisley): Its curved outline teaches learners how to balance flowing lines and fill the shape with fine details or hatching.
- The Lotus (Kamal): Drawing its petals helps beginners understand symmetry and how individual shapes come together to form a flower.
- Floral Vines (Lata): Repeating leaves and flowers along a continuous line teaches learners to connect motifs into borders and larger patterns.
But drawing these motifs is only part of the learning process. Kalamkari depends on how the cloth responds to the tools and dyes, too. In traditional methods, cotton is treated before painting, often using ingredients such as myrobalan, a fruit rich in natural tannins, and milk. These treatments help prepare the fabric for the stages that follow, including the application of iron-based black dye. Understanding why the cloth is prepared this way helps learners see that Kalamkari is as much about working with the material as it is about drawing on it.
The order of these steps can vary between Kalamkari traditions and workshops. Srikalahasti is particularly known for its freehand drawing, while Machilipatnam is associated with block printing alongside hand-drawn details. Learning the basic motifs and understanding the fabric's preparation gives beginners a foundation for exploring these different approaches without treating Kalamkari as one fixed technique.
Learning to Work with Kalamkari’s Natural Colours
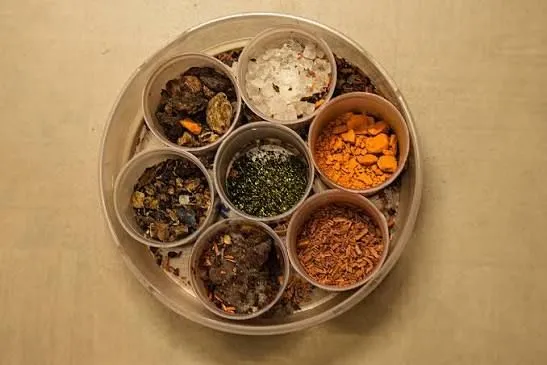
Kalamkari Natural Colors
Once the outlines are in place, a Kalamkari painting begins to take on a different character as colour enters the picture. But traditional Kalamkari colours don't always behave like the paints beginners might be familiar with. Preparing natural dyes can involve long hours of processing plant materials, preparing mordants, and carefully controlling how the colours develop. For someone learning the art for the first time, there's already plenty to discover without having to begin by making every dye from scratch.
Beginners can start by working with prepared natural dye solutions, allowing them to focus on how colour is applied and how it interacts with the fabric. Depending on the technique, these may include kasim, the iron-based black used for outlines, alum solutions that help certain dyes bind to the cloth, and plant-based colours such as those derived from pomegranate rind. The exact materials and recipes vary across Kalamkari traditions, but the principle remains the same: colour is created through a process that involves both the artist's hand and the fabric itself.
The next step is learning to fill the outlined shapes without losing the details that make the design distinctive. A broader, softer-tipped kalam can help apply colour across larger areas, while careful movements keep the dye within the intended shapes. Learners also begin to understand why the work cannot always be rushed. Depending on the dye and technique, the cloth may need time for the colour to develop before it is washed to remove excess dye and left to dry.
This rhythm of painting, washing, and drying is part of what makes Kalamkari so different from simply colouring a picture. Each stage affects what comes next, and the final result emerges gradually rather than all at once. For beginners, experiencing this process firsthand offers a glimpse into the patience and material knowledge that Kalamkari artists have built over years of practice.
Common Mistakes Beginners Make When Learning Kalamkari
When you're trying Kalamkari for the first time, it's natural to expect your hand to follow the design exactly as you imagine it. But working with a traditional kalam takes some getting used to. The flow of the dye, the movement of the bamboo pen, and the time needed for colours to settle can all feel unfamiliar at first. A few small mistakes are part of learning the craft, and knowing what to look out for can make the experience much easier.
- Holding the kalam too tightly: It's tempting to grip the bamboo tool as firmly as you would a regular pen, especially when trying to draw a straight line. But a tight grip can make your hand stiff and the lines uneven. Try holding it more gently and allowing your wrist to move naturally. With practice, you'll begin to find a grip that feels comfortable and gives you better control.
- Adding colour before the previous layer is ready: When you've finished outlining a design, you might want to move straight to the colourful part. But working too quickly can cause colours to spread beyond their intended areas. Give the fabric enough time to dry between stages, following the guidance for the particular dye you're using. A little patience can save you from having to redo your work.
- Worrying when the black lines look too light: The outlines may not look as dark as you expected when you first apply the dye. That doesn't necessarily mean you've done something wrong. In traditional Kalamkari, iron-based black dye develops through a reaction with the treated fabric, so its appearance can change as the work dries and is washed. Resist the urge to go over a wet line immediately. Give the process time before deciding whether it needs another pass.
Your first Kalamkari piece may have a few wobbly lines or colours that don't turn out quite as planned. That's part of learning to work with a new tool and material. Instead of aiming for perfection in the first session, focus on understanding how the kalam moves, how the fabric responds, and when to let each stage settle. Those small lessons are what gradually build confidence.
How Far Can You Get in a Few Sessions?
At first, learning Kalamkari can feel like a series of small exercises: getting comfortable with the bamboo kalam, practising curves, and repeating simple motifs until your hand begins to feel steadier. But with each session, these individual skills start coming together. The lines become more controlled, the patterns begin to flow, and what once seemed like an intricate design starts to feel possible.
Over the first few sessions, a beginner might make progress in stages:
- Sessions 1-2: Get familiar with the kalam, practise steady lines and curves, and begin outlining motifs such as the kalka (paisley) and simple floral borders.
- Sessions 3-4: Bring those skills together in a small panel, arranging a central motif within a decorative border and trying the process of applying natural dyes, washing the fabric, and allowing it to dry.
The most satisfying moment often comes when the cloth is washed for the first time. Excess dye comes away, and the design begins to reveal its final character. The outlines, which may have looked faint or uneven at first, become clearer as the dye develops through the traditional process. The colours settle into the fabric, and the piece starts to look less like a practice exercise and more like something you have made with your own hands.
Your first panel may not be perfect, and it doesn't need to be. What matters is seeing how the skills you practised at the beginning have helped you create something complete. That moment can make Kalamkari feel less like an art form to admire from a distance and more like a tradition you can begin to understand through practice.