

On the mud walls of villages in Maharashtra, a few simple shapes have told stories of everyday life for generations. People gather in circles to dance, farmers work in the fields, animals move through forests, and celebrations bring entire communities together. These scenes are painted using little more than white lines and basic geometric forms. This is Warli art, a traditional tribal painting style associated with the Warli community of Maharashtra.
Warli painting has its roots in the Sahyadri region, particularly in the tribal settlements around Palghar, Dahanu, and Talasari. Traditionally, women painted these scenes on the walls of their homes using rice paste on a surface prepared with mud and cow dung. Weddings, harvests, festivals, and other important occasions provided reasons to bring these walls to life. The paintings reflected the world around them, from farming and hunting to music, dance, nature, and community rituals.
What makes Warli art so recognisable is its use of simple geometry. Instead of realistic faces, detailed anatomy, or elaborate shading, artists construct human and animal figures using three basic shapes:
- The Circle: Inspired by natural forms such as the sun and moon, circles appear in dancing figures and other compositions connected with the cycles of life and nature.
- The Triangle: Drawn from the shapes of mountains, trees, and other elements of the landscape, triangles are used to construct the bodies of people and animals.
- The Square: Often called a Chaukat or Chauk, the square represents an enclosed or sacred space. It is particularly important in ritual compositions, where it can mark the space reserved for a deity or a ceremony.
These shapes might appear simple on their own, but Warli artists use them to create remarkably expressive scenes. A group of triangles and circles can become a dancing figure, while several such figures arranged in a ring can represent a community celebration. Repeated across a wall or canvas, these small forms build compositions filled with movement and activity. Understanding these three shapes is a good starting point for anyone learning Warli art. Once you know how artists use them to construct people, animals, trees, and everyday scenes, even an elaborate Warli painting becomes easier to read and recreate.
Materials Used in Warli Painting and How to Prepare Your Workspace
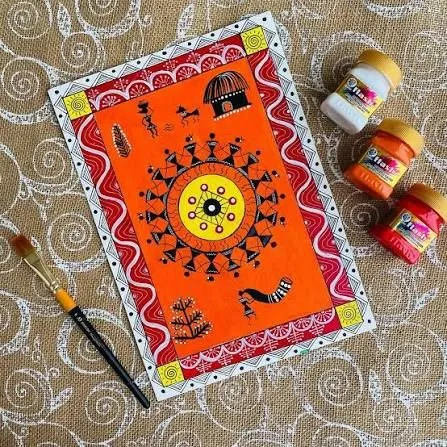
Materials Used in Warli Painting and How to Prepare Your Workspace. Source - Instagram
Before you begin drawing Warli motifs, it helps to understand the materials that give this art form its distinctive appearance. Traditional Warli paintings are known for the contrast between an earthy red-brown surface and delicate white figures. The colours are simple, but the choice of surface, pigment and applicator plays an important role in achieving that characteristic look.
Traditionally, Warli artists painted on the mud walls of their homes. These surfaces were prepared using a mixture of mud and cow dung, sometimes finished with red earth or geru. The white pigment was made from ground rice mixed with water and natural gum, while a chewed bamboo stick or small wooden twig was used to draw the figures. Today, beginners can recreate a similar colour palette with readily available art supplies.
Traditional vs. Modern Beginner Setup
| Feature | Traditional Village Setup | Modern Beginner Studio Setup |
|---|---|---|
| Canvas / Base | Mud walls coated with a mixture of cow dung (gobar) and red earth (geru) | Terracotta acrylic paint on canvas, red ochre paper or a wooden panel |
| White Pigment | Rice paste (pithali) mixed with water and natural tree gum (gond) | Opaque white acrylic paint, white gouache or liquid poster colour |
| Brush / Applicator | Chewed bamboo stick (pahi) or a small wooden twig | Fine round synthetic brush (Size 0, 1 or 2) or a white gel pen |
| Fixative | Traditionally allowed to dry naturally on the wall, with surfaces refreshed and repainted over time | Optional matte acrylic varnish or suitable spray sealant for finished work |
The Core Principles of Warli Geometry
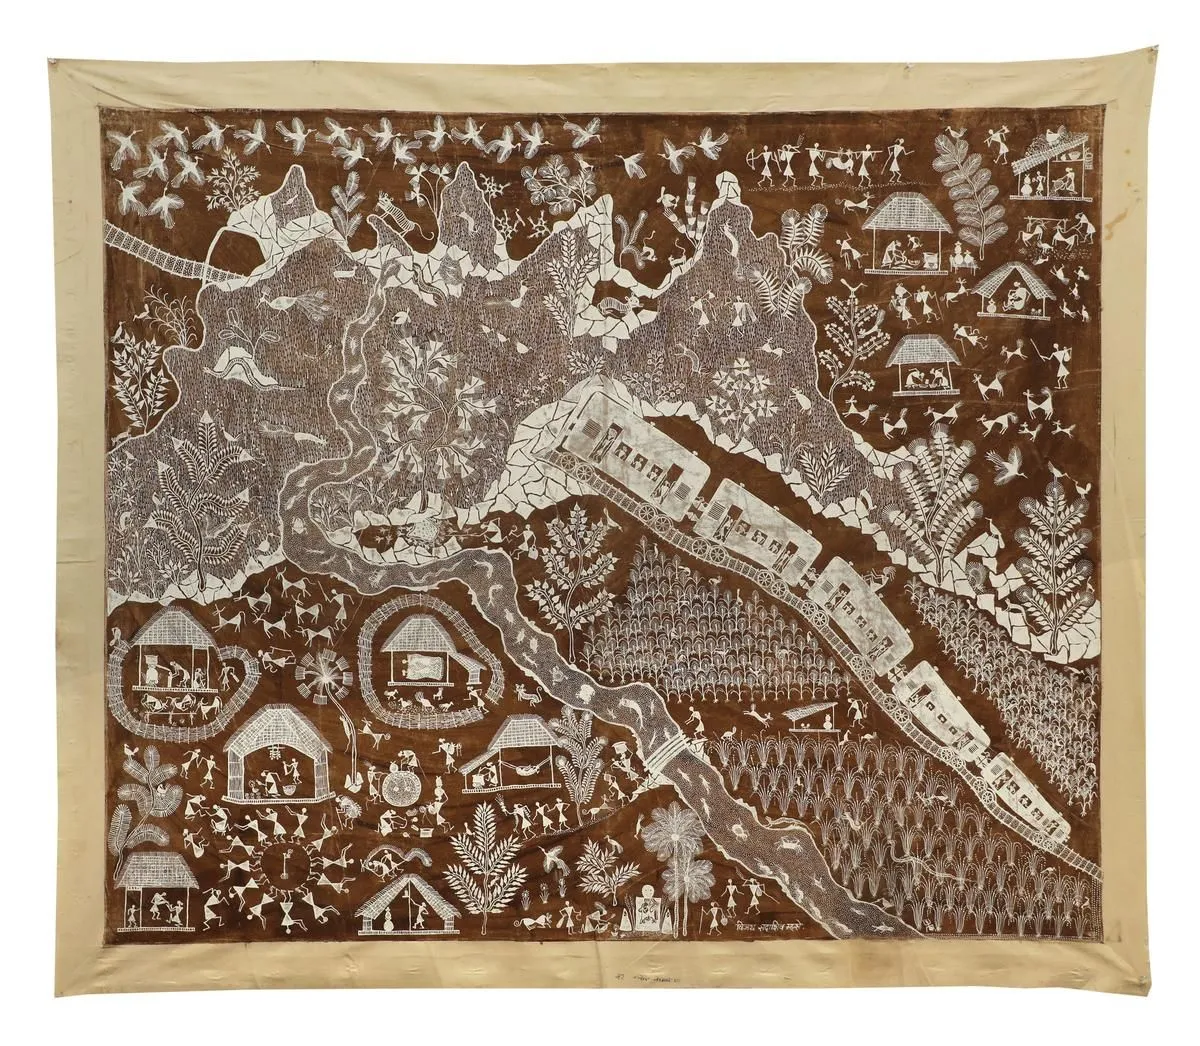
The Core Principles of Warli Geometry. Source - The Hindu
Most Warli figures begin with a surprisingly simple arrangement of shapes. A circle forms the head, two triangles joined at their tips create the torso, and a few straight lines bring the arms and legs to life. Once you understand this basic structure, drawing people, dancers and even animals becomes much easier.
The most recognisable feature of Warli human anatomy is the dual-triangle torso. The two triangles meet at their apexes, creating an hourglass-like shape that gives the figure its distinctive appearance.
   O          Circle: Head
  / \
 /   \        Upper triangle: Chest and torso
  \ /
   X          The two triangles meet at the waist
  / \         Lower triangle: Pelvis and lower torso
 /   \
/     \       Legs: Stance and movement
Understanding the Two Triangles
- Upper Triangle: The inverted triangle represents the upper part of the body, including the chest and torso.
- Lower Triangle: The upright triangle represents the pelvis and lower torso.
- The Meeting Point: The two triangles meet at the waist. This narrow connection gives the figure its characteristic balance and allows the artist to suggest different movements by changing the angle of the triangles.
- The Head and Limbs: A simple circle represents the head, while straight or slightly curved lines form the arms and legs.
The two triangles are more than a convenient drawing technique. Their arrangement is one of the defining features of Warli visual language. The narrow meeting point also makes it possible to create figures that appear to bend, walk, dance, work or interact with one another without drawing detailed anatomy.
Animals can be constructed using similar geometric principles, although their bodies are often arranged horizontally. This is why learning to draw the human figure is such a useful starting point for anyone practising Warli art.
12 Easy Warli Patterns to Draw Step by Step
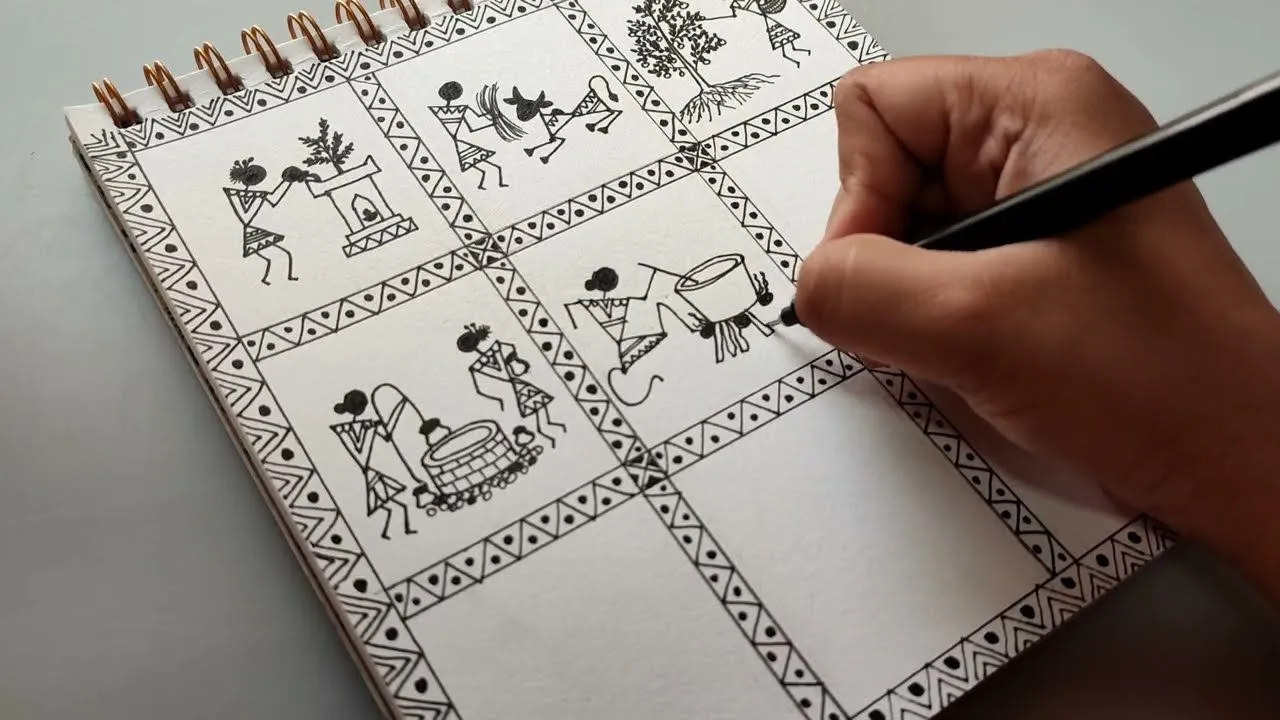
12 Easy Warli Patterns to Draw Step by Step. Source - YouTube
Warli paintings bring together people, animals, trees, musical instruments, houses and scenes from everyday village life. A single composition can show farmers working in the fields, women carrying water, children playing, animals grazing and an entire community gathering for a celebration.
The easiest way to practise these scenes is to break them down into individual motifs. Start with simple shapes, pay attention to the direction of each line, and gradually add smaller details. The following 12 patterns will help you build the visual vocabulary needed to create your own Warli compositions.
Pattern 1: The Basic Human Figure
What it represents: Human figures are at the heart of Warli painting. They appear in scenes of farming, dancing, hunting, celebrations and everyday village activities.
Step-by-step instructions:
- Draw the Head: Begin with a small, solid white circle near the top of your figure. Warli faces are usually left without detailed facial features.
- Make the Upper Triangle: Draw an inverted triangle beneath the head. Leave a small gap between the circle and the triangle for the neck.
- Add the Lower Triangle: Draw an upright triangle beneath the first one, joining the two triangles at their tips. This creates the characteristic hourglass-shaped torso.
- Draw the Arms: Add two thin lines from the upper sides of the torso. Keep them straight for a standing figure or bend them at an angle to suggest movement.
- Add the Legs: Draw two lines extending from the lower part of the figure. Their angle and position will determine whether the person appears to be standing, walking or dancing.
- Creating different figures: Traditional Warli paintings use variations in hairstyles, clothing and posture to distinguish people. For a beginner's exercise, you can experiment with a small hair bun or tied-up hairstyle for one figure, and a different head or clothing detail for another. You can also make the lower triangle slightly wider to suggest a skirt or draped garment. Treat these as drawing variations rather than fixed rules for depicting men and women.
Pattern 2: The Tarpa Dancer
What it represents: The Tarpa dance is among the most recognisable subjects in Warli painting. It is a community dance performed to the music of the tarpa, a wind instrument with a long, horn-like shape. Dancers move together in a circular formation, following the musician's rhythm and direction.
Step-by-step instructions:
- Mark the Dance Formation: Lightly draw a large circle or spiral on your surface. This will help you arrange the dancers without making the formation uneven.
- Position the Figures: Draw small human figures along the circular path, using the dual-triangle torso. Keep their size consistent so the group looks connected.
- Join the Dancers: Extend their arms towards one another to create a continuous chain. In many traditional depictions, dancers hold or link hands as they move together.
- Show the Movement: Angle the legs in different directions to suggest stepping and turning. Slight variations in the posture will make the dance appear more lively.
- Add the Tarpa Player: Place a musician near the centre of the formation, holding the long wind instrument. This helps establish the movement and rhythm of the scene.
The dancers do not need elaborate costumes or detailed faces. Their arrangement, repeated figures and changing leg positions are enough to convey the energy of the performance.
Pattern 3: The Tree of Life
What it represents: Trees and vegetation are recurring subjects in Warli painting. They reflect the close relationship between the Warli community, the forests and the natural environment around them. Tree compositions are also popular in contemporary Warli-inspired artwork.
Step-by-step instructions:
- Draw the Trunk: Begin with a vertical line in the centre of your composition. Make it slightly wider at the base and narrower towards the top.
- Add the Branches: Draw smaller branches extending diagonally from both sides of the trunk. Let them spread out as they move upwards.
- Create the Leaves: Add small pointed leaves along each branch. You can use tiny triangles, short strokes or teardrop shapes.
- Build the Canopy: Repeat the leaves and branches until the tree looks full. Vary their direction and spacing to avoid making the foliage appear too uniform.
- Add Birds and Animals: Place a pair of birds on the upper branches or draw small animals near the base of the tree. These details can help turn a simple tree into a larger scene.
For a more traditional composition, surround the tree with elements of village life, such as grazing cattle, people gathering wood or birds resting among the branches.
Pattern 4: The Sun (Surya) and Moon (Chandra)
What they represent: The sun and moon are familiar elements in Warli painting, reflecting the importance of natural cycles and the passage of time. Their simple circular forms also connect with the geometric vocabulary of the art form.
Step-by-step instructions:
- Draw the Sun: Make a solid white circle in the upper portion of your composition.
- Add the Rays: Draw short lines or pointed triangular shapes around the circle to represent sunlight.
- Vary the Pattern: Alternate longer and shorter rays to create a more interesting outline. You can also use small dots or repeated strokes around the edge.
- Draw the Moon: For a crescent moon, begin with a curved outline and add a second curve inside it to create the crescent shape.
- Complete the Scene: Place a few small dots around the moon or add a tree, bird or human figure below it to create a simple night-time composition.
These are beginner-friendly variations. Traditional Warli depictions can be much more restrained, so the sun and moon do not always need elaborate rays or surrounding stars.
Pattern 5: The Peacock (Mayura)
What it represents: Birds, including peacocks, are frequently found in Warli paintings. Their presence adds movement and variety to compositions featuring trees, animals and village life.
Step-by-step instructions:
- Draw the Head and Neck: Start with a small circle for the head and extend a curved line downwards to form the slender neck.
- Create the Body: Draw an oval or elongated shape behind the neck. Fill it with white paint or decorate it with small geometric patterns.
- Add the Beak and Crest: Draw a small pointed beak at the front of the head. Add a few short strokes above it to suggest the crest.
- Draw the Tail: Extend several long, curved lines from the back of the body. Arrange them in a fan-like formation.
- Add Feather Details: Finish the tail with small circles, teardrops or repeated lines. These details will make the bird easier to recognise.
You can draw the peacock standing beneath a tree or facing another bird to make the motif part of a larger composition.
Pattern 6: The Bull and Cow
What they represent: Cattle are an important part of agricultural life and frequently appear in Warli scenes. Cows and bulls can be shown grazing, standing near a hut or accompanying people during farming activities.
Step-by-step instructions:
- Draw the Body: Start with an elongated horizontal shape. You can use a rectangle with softened corners or two triangular forms joined at their tips to create a stylised body.
- Add the Legs: Draw four straight or slightly bent lines beneath the body. Keep them short enough to maintain the animal's proportions.
- Create the Neck and Head: Extend a short line upwards from the front of the body and finish it with a small head and pointed snout.
- Draw the Horns: Add two curved or angled horns above the head. Their shape can be adjusted to distinguish one animal from another.
- Finish the Tail: Draw a thin line extending from the back of the body, ending with a small tuft.
Once you are comfortable with the basic form, try drawing two cattle together or adding a person leading a bullock. This will help you practise showing relationships between figures in a single scene.
Pattern 7: The Village Hut
What it represents: Houses and huts are important elements of Warli compositions because they provide a glimpse into domestic and community life. They are often placed alongside trees, fields, people and animals.
Step-by-step instructions:
- Draw the Walls: Make a square or rectangle to form the main structure of the hut.
- Add the Roof: Draw a broad triangular roof above the walls. Let its edges extend slightly beyond the sides of the house.
- Create the Thatched Texture: Fill the roof with short, closely spaced strokes or diagonal lines to suggest straw and grass.
- Draw the Doorway: Add a small rectangular opening in the centre or towards one side of the wall.
- Add the Surroundings: Place a tree, a person or a small animal beside the hut. You can also draw a few short lines beneath it to suggest the ground.
Keep the structure simple. The roof, walls and doorway should be recognisable even when drawn with only a few strokes.
Pattern 8: The Tarpa Musician and Dhol Player
What they represent: Music is closely connected with community gatherings and celebrations in Warli life. Musicians are often shown alongside groups of dancers, especially in compositions depicting the Tarpa dance.
Step-by-step instructions:
- Draw the Musician: Begin with a standing human figure using the familiar circle-and-two-triangle structure.
- Add the Instrument: For a Tarpa player, draw a long, tapering wind instrument extending from the mouth. For a dhol player, draw a cylindrical or elongated drum across the waist.
- Position the Arms: Extend the arms towards the instrument. A Tarpa player holds the instrument near the mouth, while a drummer positions the hands near either side of the drum.
- Add the Supporting Details: Draw a strap across the body if needed to hold the drum in place. You can also add short lines around the instrument to suggest movement.
- Complete the Scene: Place dancers beside the musician or arrange them in a circle around the Tarpa player.
The instrument should remain recognisable through its shape and position. Avoid adding too many details that make the small figure difficult to read.
Pattern 9: The Fish (Matsya)
What it represents: Fish and other aquatic creatures appear among the animals and natural elements depicted in Warli painting. They can be used to suggest rivers, ponds and the relationship between village life and the surrounding environment.
Step-by-step instructions:
- Draw the Body: Make two gently curved lines that meet at pointed ends, forming an elongated oval or almond-shaped body.
- Add the Tail: Attach a triangular or forked shape to one end of the body.
- Draw the Fins: Add small triangular fins along the upper and lower edges.
- Mark the Eye: Place a small white dot near the front of the fish.
- Decorate the Body: Fill the body with repeated chevrons, short lines, dots or small geometric patterns. Keep the pattern evenly spaced.
You can draw two or three fish facing different directions to create a simple aquatic scene. Repeating the same motif at different angles is also a useful way to practise consistency.
Pattern 10: The Sacred Chauk and Palaghata
What it represents: The Chauk is one of the most important ritual compositions in traditional Warli painting. It is a square or rectangular frame associated with marriage and fertility rituals. Within it, artists depict Palaghata, the mother goddess associated with fertility and marriage.
This is different from an ordinary decorative border or a square house motif. The Chauk has a specific ritual purpose, and its design and details can vary across Warli communities.
Step-by-step instructions for a beginner's practice version:
- Draw the Outer Square: Make a large, even square in the centre of your surface. This forms the main frame of the Chauk.
- Add the Inner Frame: Draw another square inside it, leaving enough space between the two outlines for decorative details.
- Decorate the Border: Fill the space between the squares with repeated triangles, chevrons, dots or zigzag patterns.
- Create the Central Figure: Practise a simple abstract human form inside the smaller square. Use the dual-triangle torso and a circular head as a starting point.
- Add the Surrounding Details: Depending on the composition you are practising, add small motifs inspired by marriage rituals, plants or everyday objects.
In traditional Chauk paintings, Palaghata's depiction and the surrounding ritual details follow established conventions that may differ from one area to another. A beginner's geometric exercise can help you understand the layout, but it should not be treated as a complete reproduction of a ceremonial painting.
Pattern 11: The Farming and Harvest Scene
What it represents: Farming is one of the recurring subjects in Warli painting. Scenes of sowing, harvesting, tending crops and working together reflect the community's relationship with the land and the changing agricultural seasons.
Step-by-step instructions:
- Draw the Ground: Make a horizontal line across the lower part of your composition. This will serve as the ground on which the figures and crops stand.
- Add the Farmers: Draw two or three human figures using the dual-triangle torso. Vary their positions to show different stages of work.
- Show Bending Movements: Tilt the upper body forward and angle the arms towards the ground to create the appearance of someone sowing seeds or cutting crops.
- Add Farming Tools: Draw a small curved sickle in one figure's hand. For another, use a few dots falling from the hand to suggest seed sowing.
- Draw the Crops: Add short vertical stems along the ground line, finishing them with small leaves or pointed shapes.
- Build the Scene: Include a tree, a hut or a few animals to give the composition a sense of its surroundings.
The figures do not need complicated poses. Changing the angle of their torsos, arms and legs is enough to show that each person is doing a different task.
Pattern 12: The Decorative Border (Lata / Bel)
What it represents: Repeated lines and geometric patterns can be used to frame a Warli composition and bring its different elements together. Plant-like creepers and foliage-inspired designs are also useful decorative motifs.
Step-by-step instructions:
- Mark the Margins: Draw two parallel lines along the edge of your canvas or paper. Leave enough space between them for the pattern.
- Create a Flowing Line: Draw a continuous wavy line between the margins, moving from one side to the other.
- Add Leaves: Place small pointed leaves or teardrop shapes along the curves of the line. Alternate their direction to create a natural rhythm.
- Repeat the Pattern: Continue the same design along the remaining sides. Try to keep the spacing consistent, especially where the lines meet at the corners.
- Finish the Border: Add dots, short strokes or small triangles in the empty spaces. Use white paint to maintain the contrast with the red-brown background.
A border should complement the main composition rather than compete with it. Keep the pattern simple if the central painting already contains many figures and details.
Bringing the 12 Warli Motifs Together
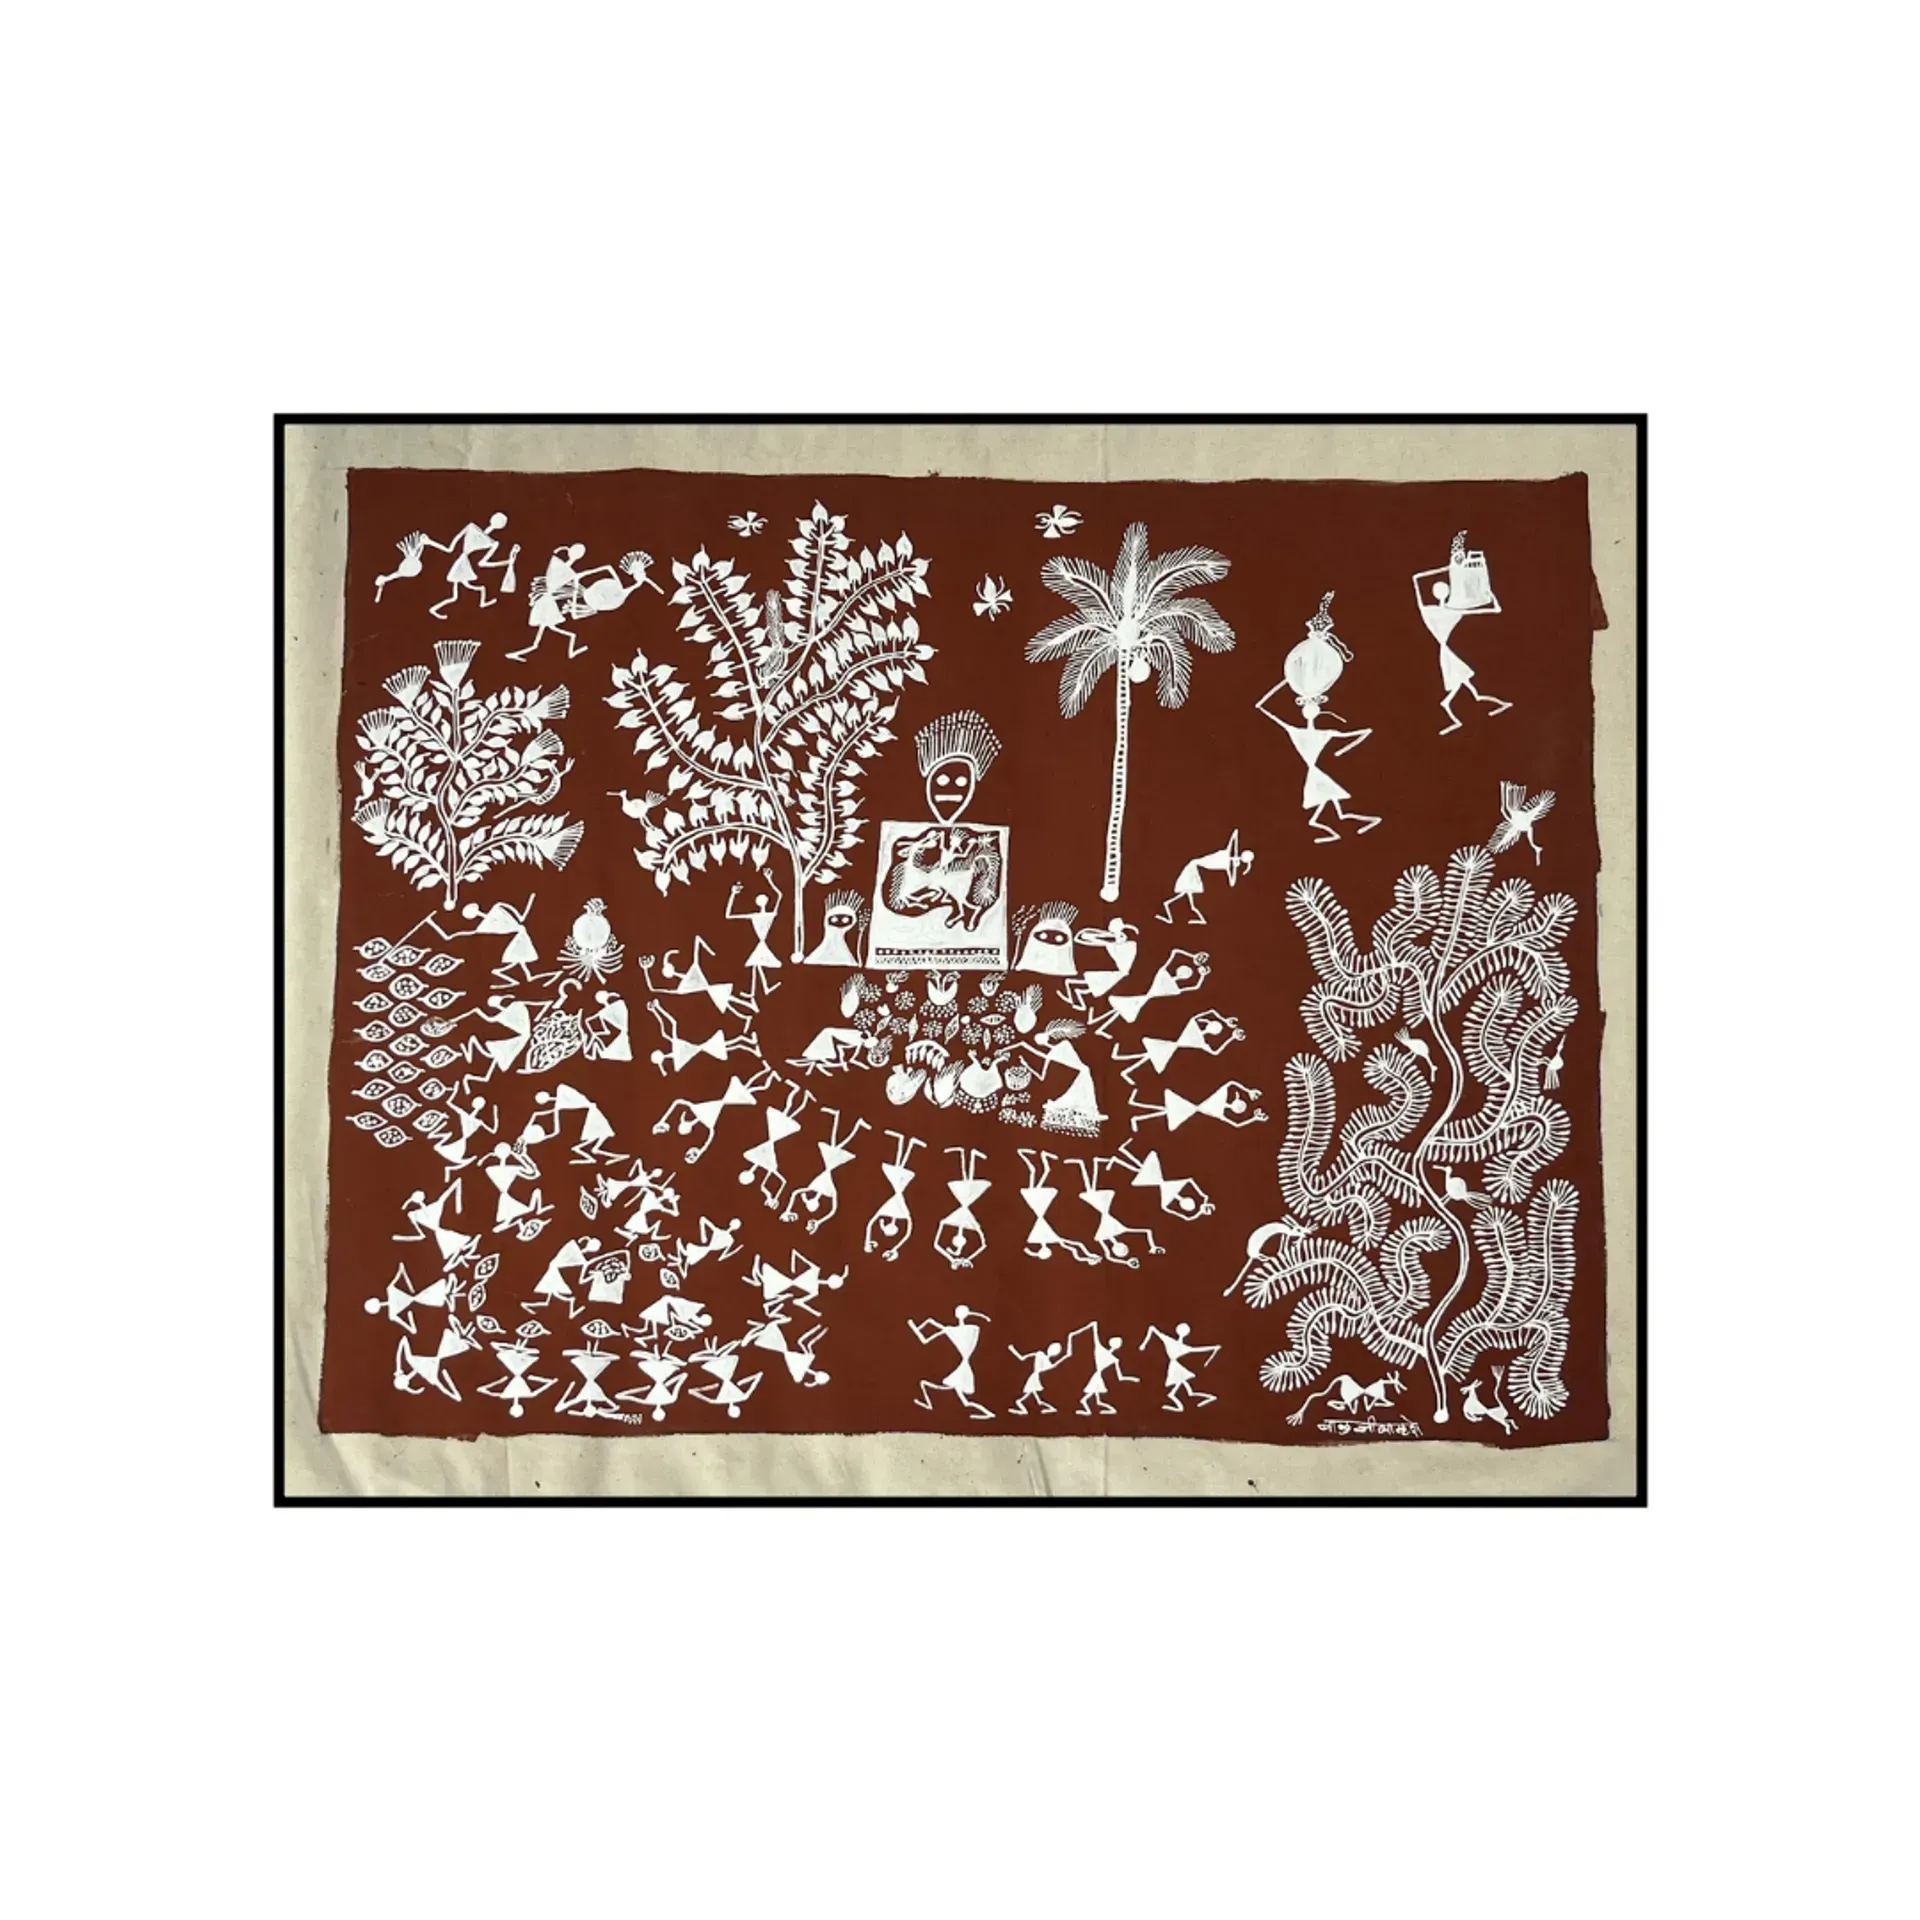
Bringing the 12 Warli Motifs Together
Once you have practised these patterns individually, try combining a few of them on a single surface. Begin with a central element, such as a tree, a group of dancers or a village hut. Add human figures around it, followed by animals, birds and smaller details that help establish the setting. Pay attention to how the figures relate to one another. A farmer should appear to be working on the ground, dancers should follow a shared formation, and animals should feel connected to the landscape around them.
Repetition helps create rhythm, while small changes in posture keep the composition from looking static. This is where the strength of Warli geometry becomes clear. A handful of circles, triangles, lines and squares can tell an entire story about people, nature and community life. The challenge is learning how to arrange those simple shapes so that the scene feels alive.
Frequently Asked Questions
1. What are the basic shapes used in Warli painting?
Warli painting primarily uses three geometric shapes: circles, triangles and squares. Circles are commonly used for heads and natural elements such as the sun and moon. Triangles form human and animal bodies, while squares appear in architectural and ritual motifs, including the Chauk.
2. How do you draw a basic Warli human figure?
Start with a small circle for the head. Draw two triangles joined at their tips beneath it to create the torso. Add thin lines for the arms and legs. You can change the angles of these lines to show the figure standing, walking, dancing or working.
3. Why are two triangles used to draw the human body in Warli art?
Two triangles joined at their apexes create the distinctive hourglass-shaped torso found in Warli human figures. The upper triangle represents the chest and upper body, while the lower triangle represents the pelvis and lower torso. This simple construction allows artists to suggest different postures without detailed anatomy.
4. How do you draw a Tarpa dance in Warli painting?
Begin by arranging small human figures along a circular or spiral path. Connect their hands to suggest a group dance, and vary the positions of their legs to show movement. Add a musician playing the Tarpa near the centre of the formation to complete the scene.
5. What is the significance of the Tarpa in Warli art?
The Tarpa is a traditional wind instrument associated with Warli community celebrations and group dances. In paintings, a musician playing the instrument is often surrounded by dancers arranged in a circle or spiral. The scene reflects collective participation, music and celebration.
6. What is the Chauk in Warli painting?
The Chauk is a sacred geometric composition traditionally associated with Warli marriage and fertility rituals. It usually takes the form of a square or rectangular frame containing Palaghata, the mother goddess associated with fertility and marriage. It is an important ritual motif rather than an ordinary decorative border.
7. What is the easiest Warli animal to draw for beginners?
A fish or bird is a good starting point because its body can be created using simple geometric shapes. Begin with an oval or almond-shaped body, add a tail and fins or wings, and finish with small details such as an eye and repeated patterns.
8. How do you draw a Warli tree?
Start with a vertical trunk and add branches extending diagonally from both sides. Draw small leaves along the branches using triangles, dots or short strokes. You can add birds, animals or human figures around the tree to create a larger composition.